See other “How to”
How to Perform Endoscopic Sleeve Gastroplasty (ESG)
Description :
How to Perform Endoscopic Sleeve Gastroplasty (ESG): Step-by-Step Tutorial
Disclaimer: For professional use only. This guide is intended for trained endoscopists with experience in therapeutic endoscopy and suturing techniques.
I. PRE-PROCEDURAL CONSIDERATIONS
1. Patient Selection
- BMI ≥30 kg/m² (typically 30–40 kg/m²)
- Failed lifestyle modification (diet, exercise)
- No large hiatal hernia, active peptic ulcer, or severe GERD
- Psychologic evaluation and multidisciplinary clearance
2. Preparation
- Informed consent
- Liquid diet 24–48 hours prior
- Fasting: 8h for solids, 2–4h for clear liquids
- General anesthesia with endotracheal intubation
II. EQUIPMENT SETUP
- Endoscope: Therapeutic gastroscope (e.g., Olympus GIF-2TH190 or Olympus GIF-1TH190)
- Suturing System: Apollo OverStitch™ or Apollo OverStitch Sx™
- Accessories:
- Helix tissue retractor
- Suture cinch device
- CO₂ insufflation
- Irrigation pump
- Hemostatic tools
III. PROCEDURAL STEPS
1. Diagnostic Evaluation
- Perform full diagnostic EGD
- Clean stomach of residual contents
- Check for contraindications
2. Device Mounting and Setup
- Mount the OverStitch™ system on the endoscope
- Load suture and test mechanics
3. Positioning
- Navigate to ~4 cm above the pylorus
- Alternate forward and retroflex views for orientation
IV. FULL-THICKNESS SUTURING TECHNIQUE
Goal
To create a tubular sleeve by imbricating the anterior, greater curvature, and posterior gastric walls using full-thickness running or interrupted sutures.
A. Suturing Maneuver (OverStitch™ System)
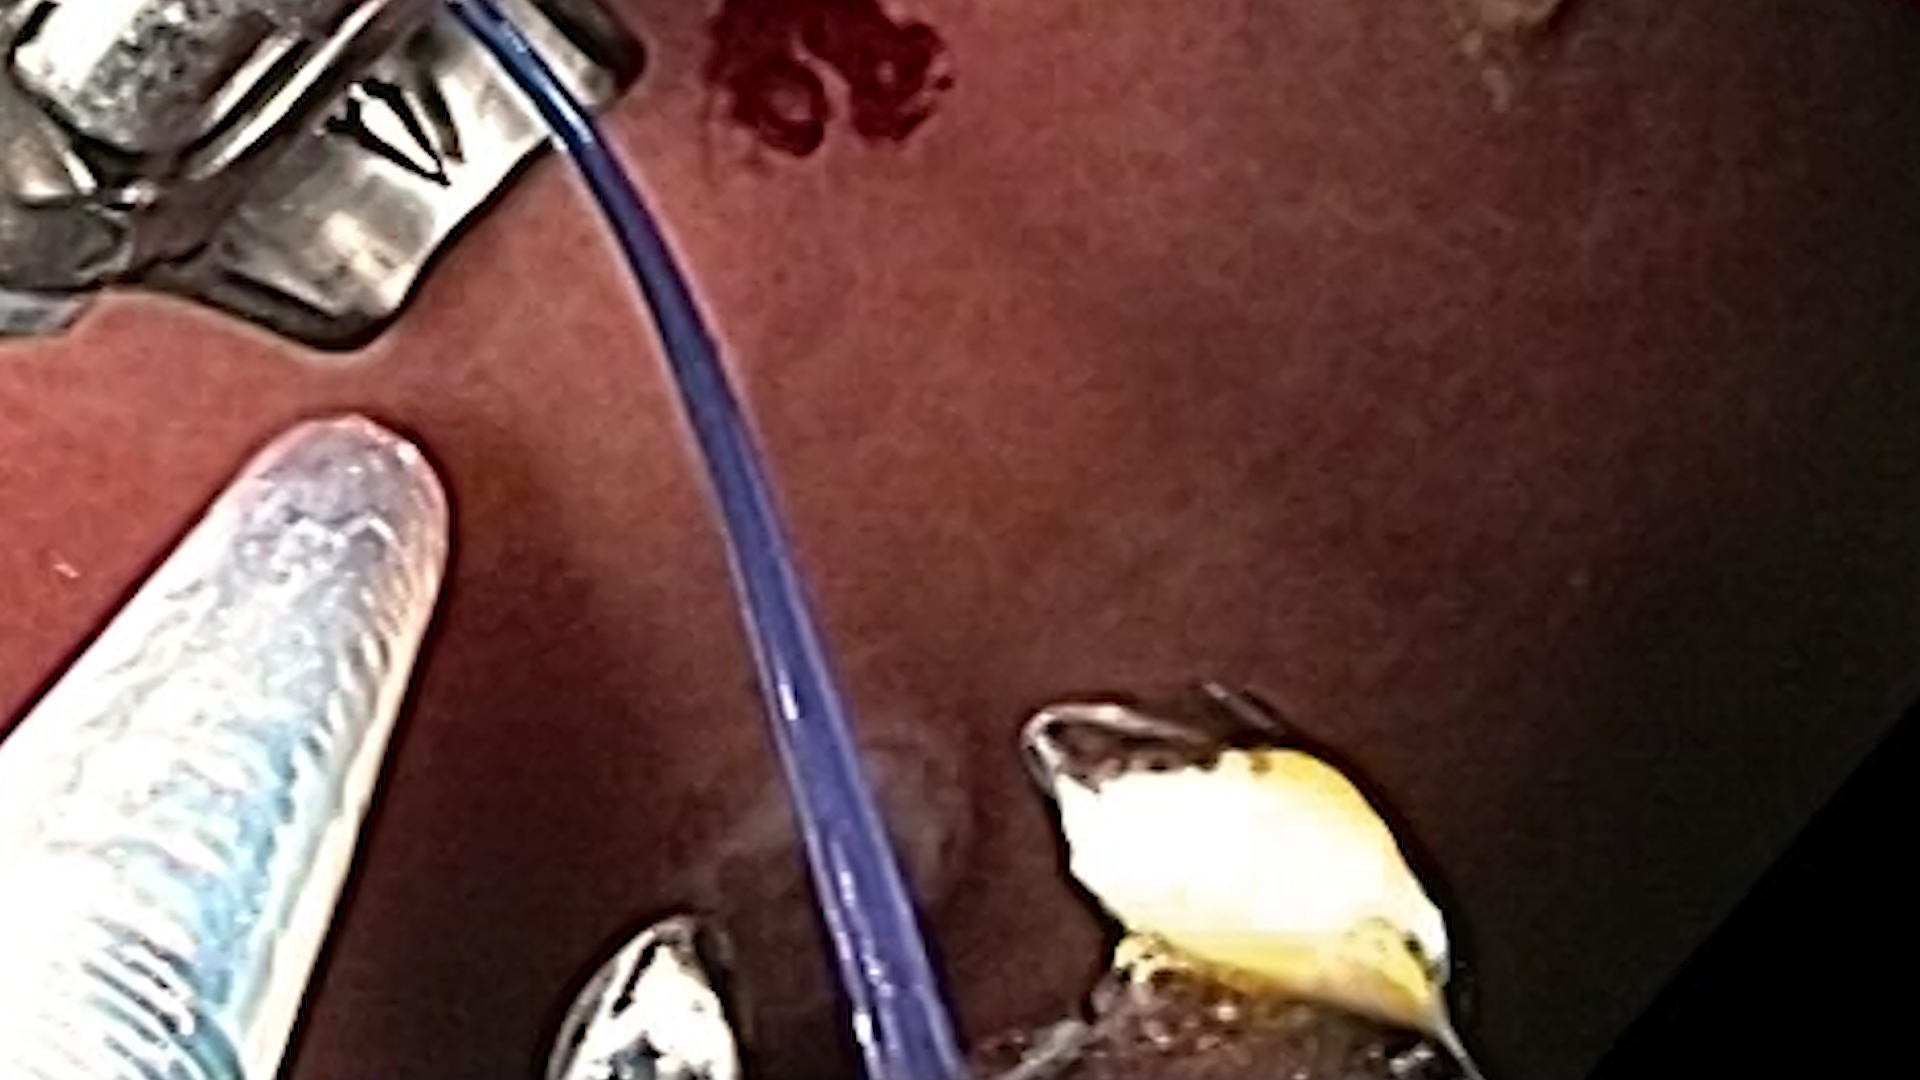
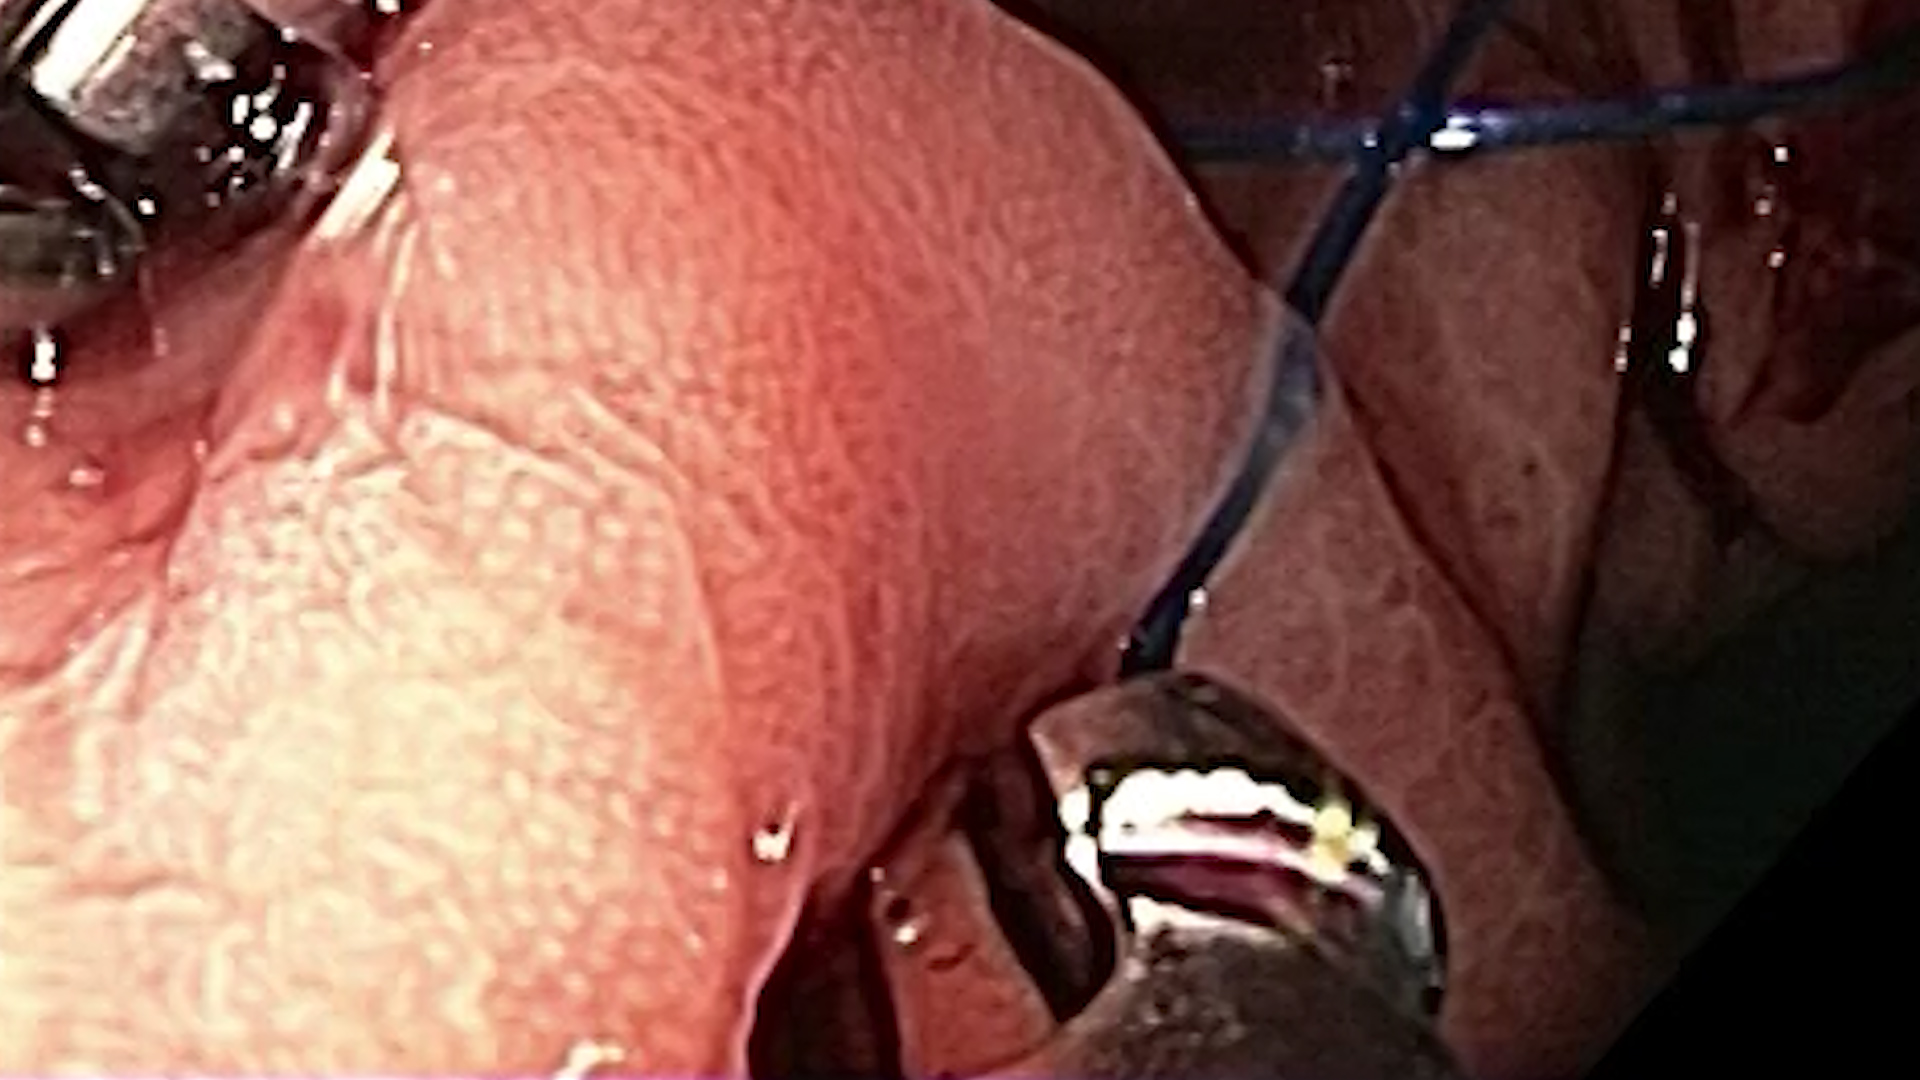
1. Grasping the Tissue
- Insert the tissue helix through the working channel
- Rotate clockwise to penetrate and anchor full-thickness gastric wall
- Pull tissue into view between suturing arms
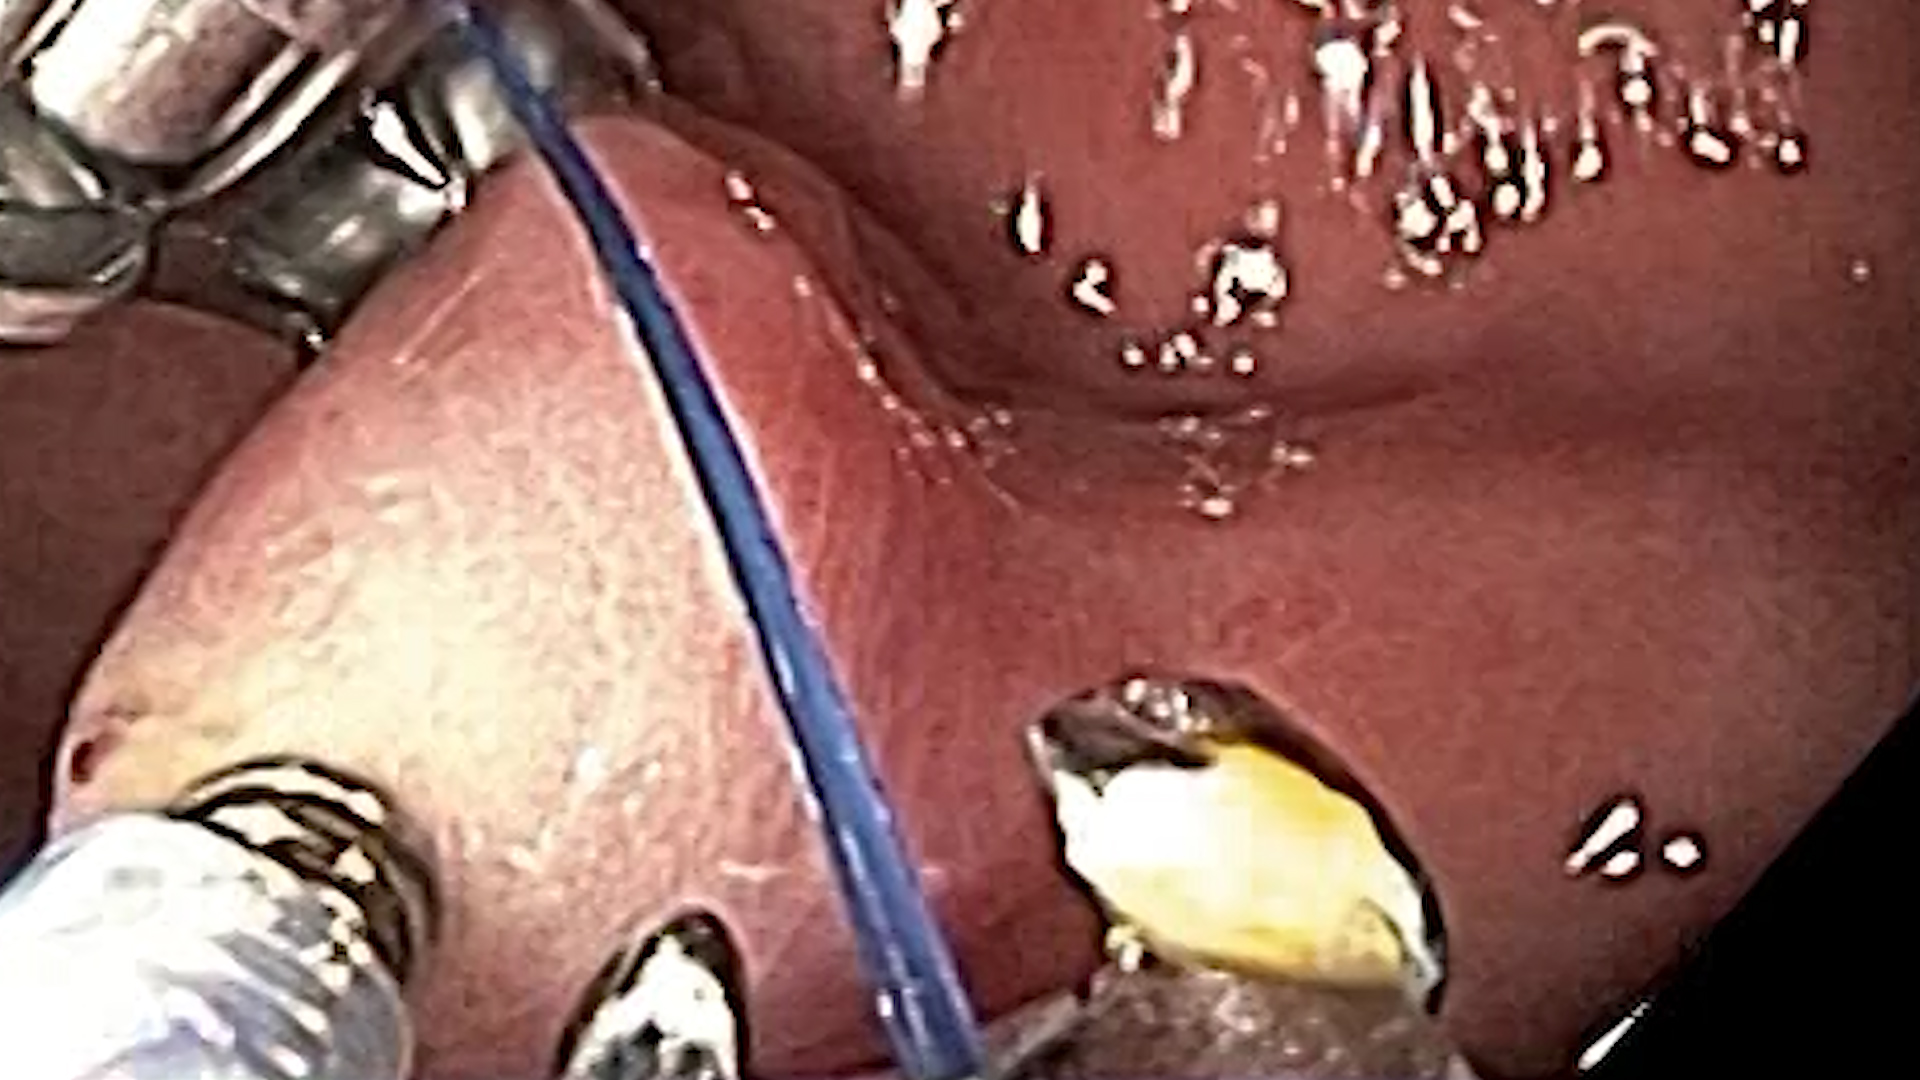
2. Advancing the Needle
- Align tissue centrally between drive (left) and capture (right) arms
- Activate needle driver:
- Needle passes left to right through the tissue
- Needle tip locks into receiving arm
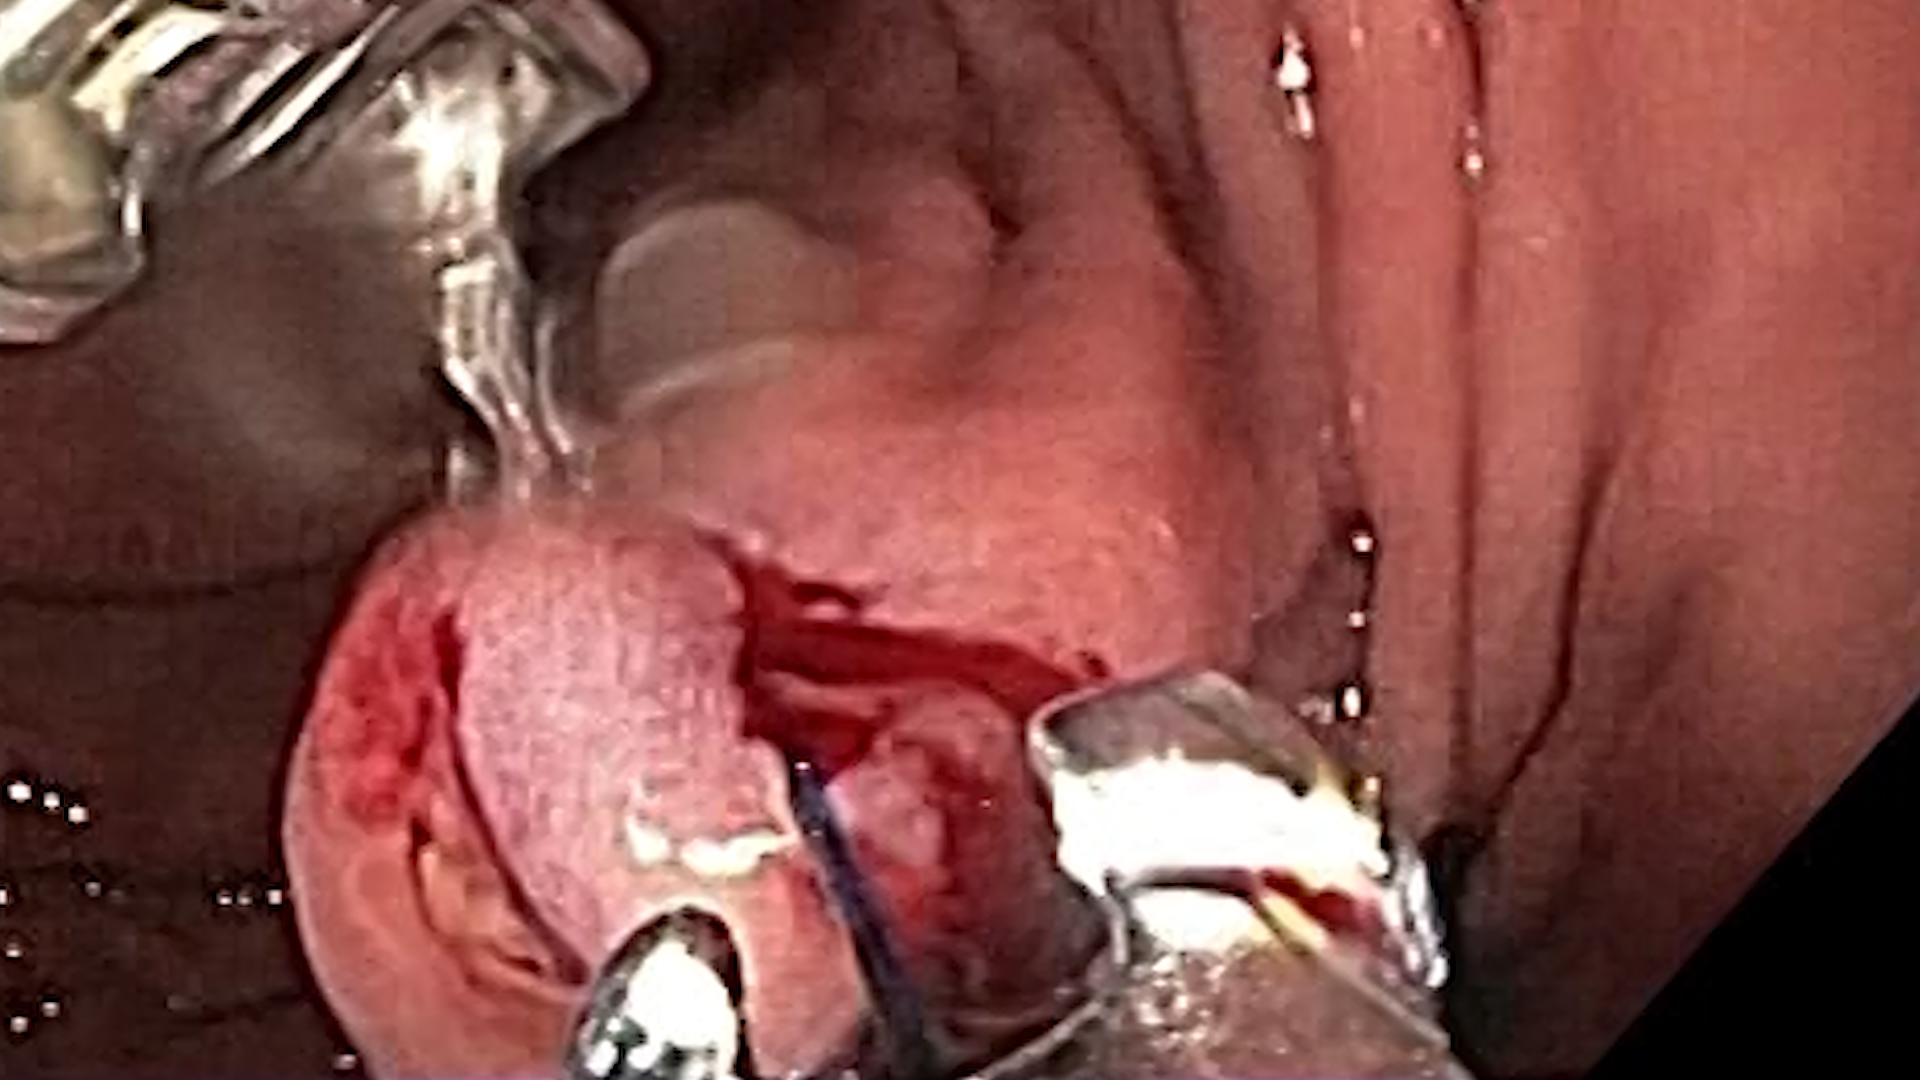
3. Releasing and Repositioning
- Rotate helix counterclockwise to release tissue
- Withdraw helix for next bite
- Adjust scope or device to align next suture site
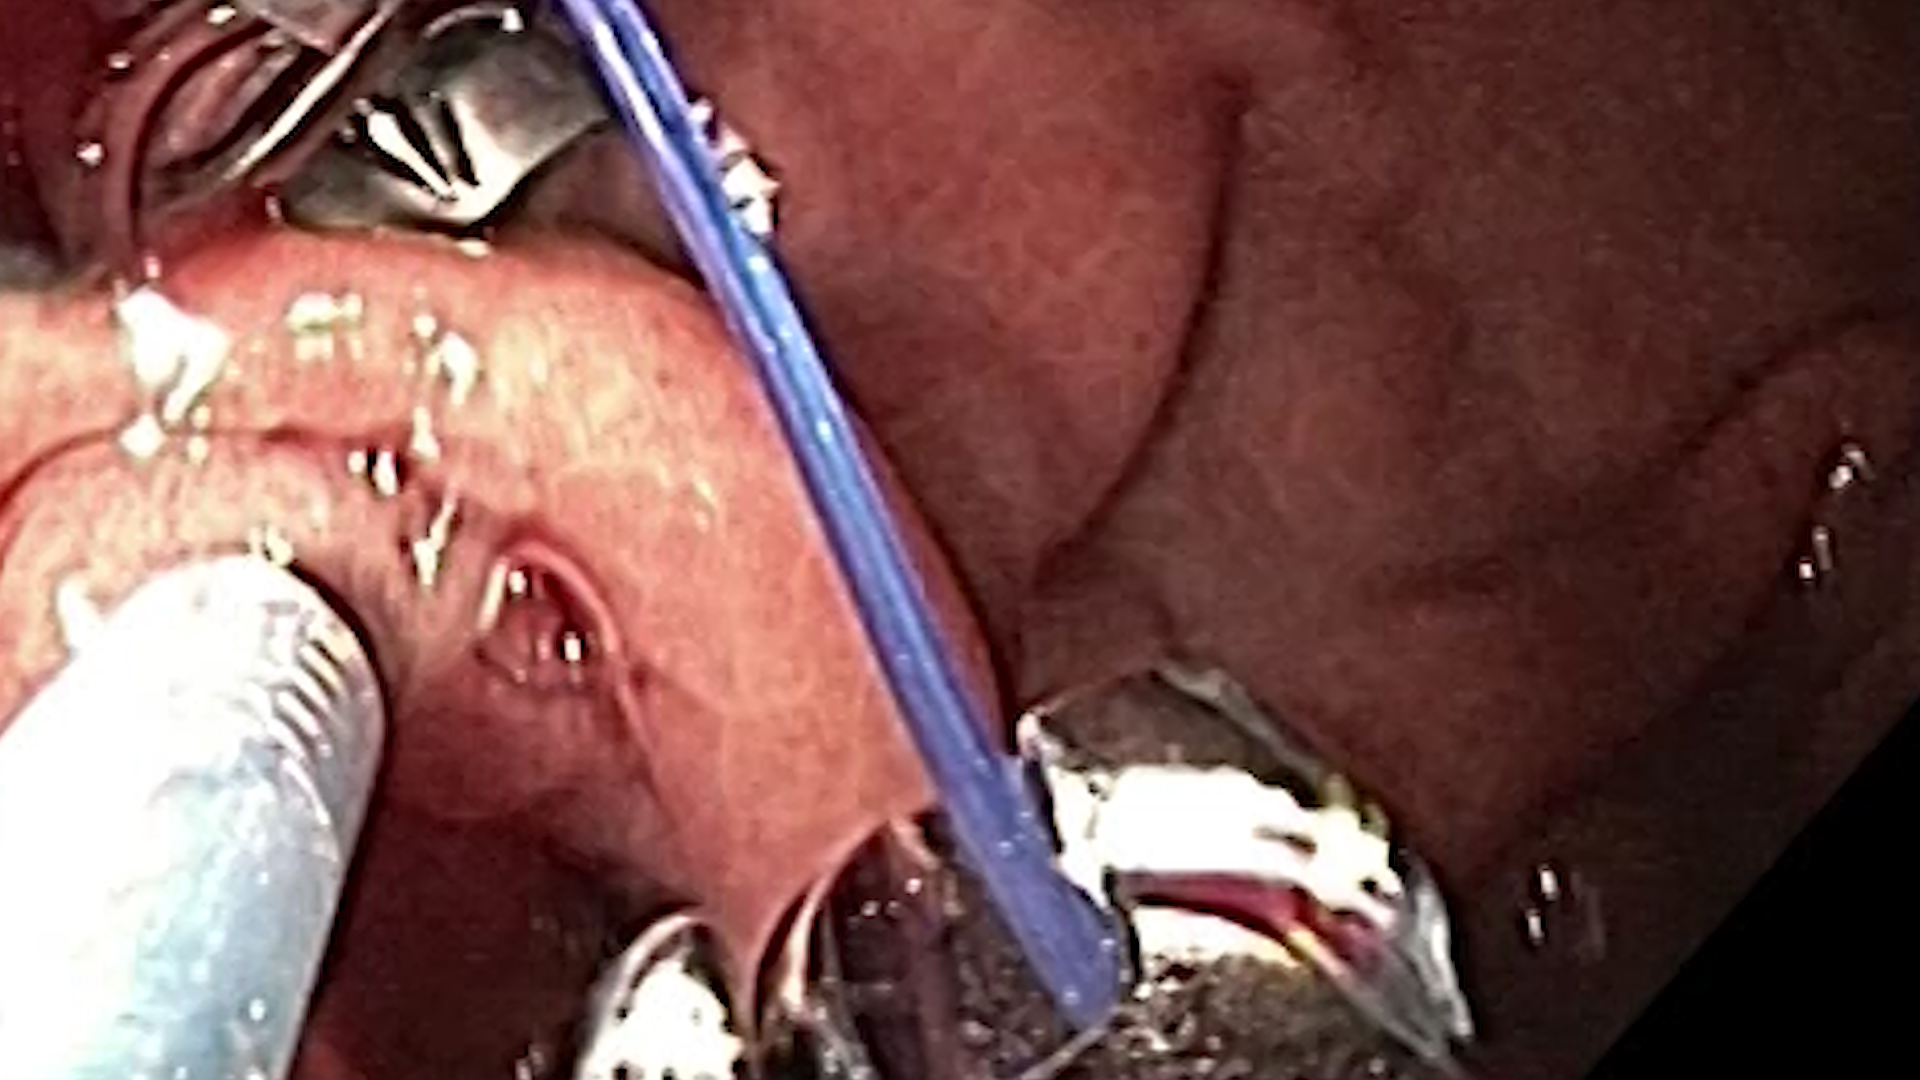
4. Retrieving the Needle Back
- Activate device to retrieve needle from right to left
- Suture now bridges the tissue bite
- Repeat steps to continue the stitch pattern (typically 6–8 bites)
5. Cinching the Suture
- After final bite, pull suture to tighten plication
- Deploy cinch to lock the suture
- Cut the suture with integrated cutter
6. Repeat Rows
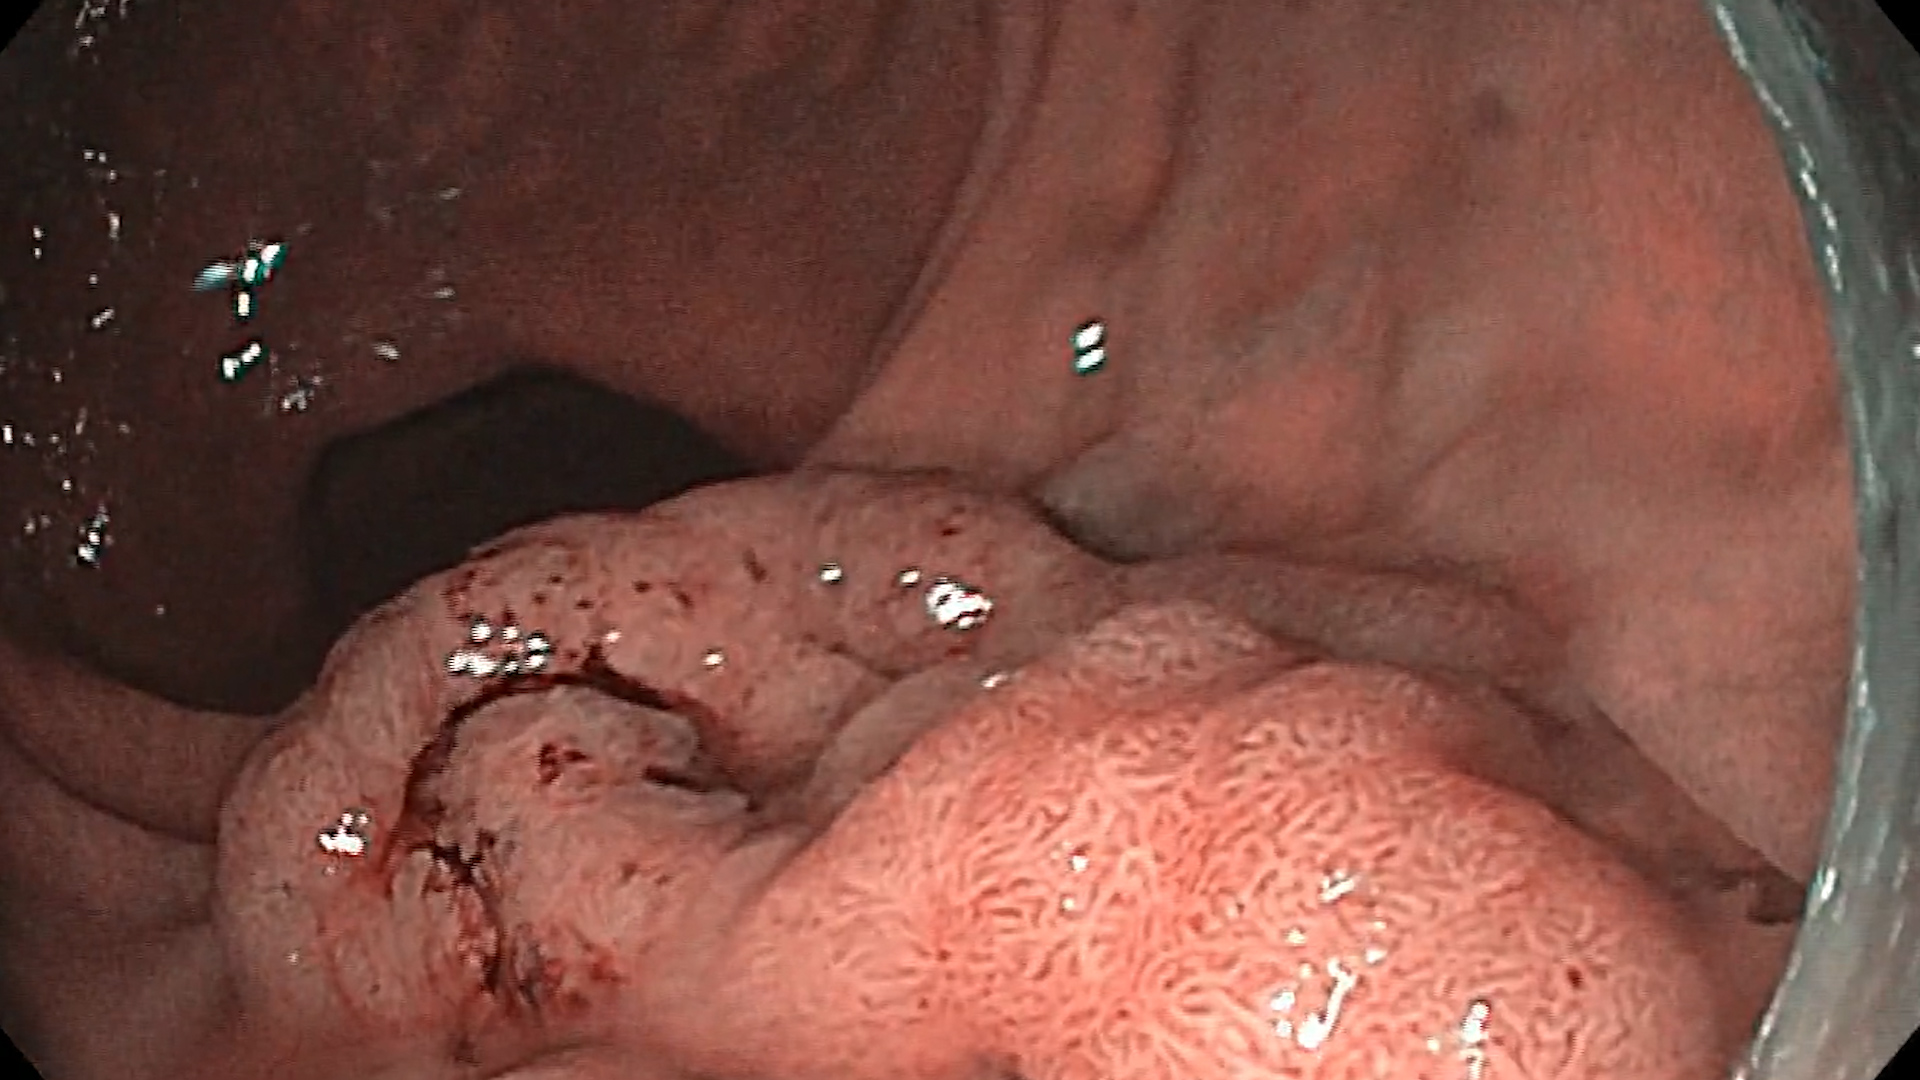
- Perform 5–7 rows of plications from the distal body toward the fundus
- Leave a small proximal pouch to avoid fundic ischemia
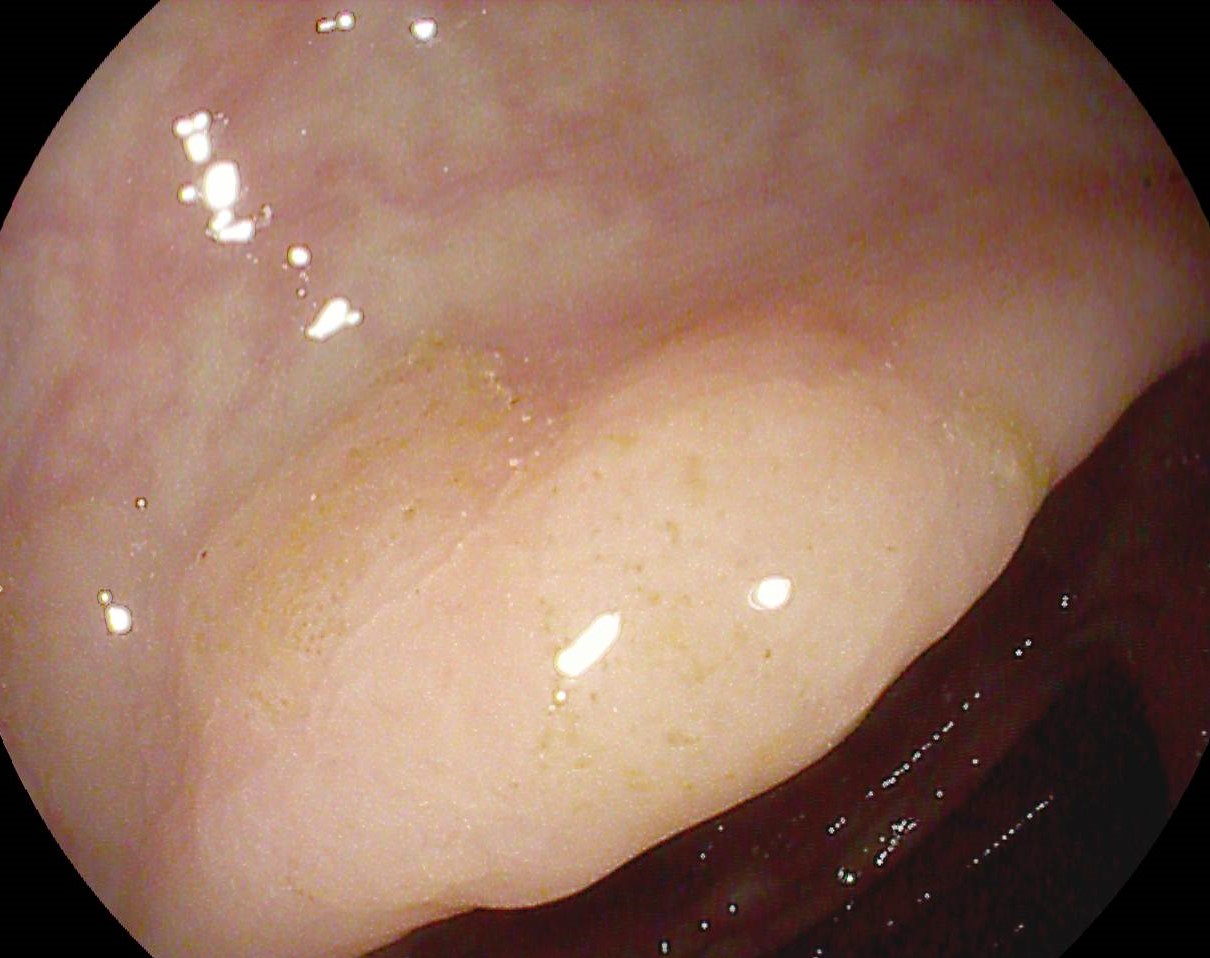
V. FINAL INSPECTION
- Use retroflexion to assess sleeve formation
- Check for bleeding, gaps, or perforation
- Document with photos/video
VI. POST-PROCEDURE CARE
1. Immediate Recovery
- Observe in PACU for 4–6 hours
- IV hydration, analgesics, antiemetics
- Discharge same day or next morning
2. Diet Advancement
| Phase | Duration | Diet |
| I | Day 0–3 | Clear liquids |
| II | Day 4–14 | Full liquids |
| III | Weeks 3–4 | Pureed foods |
| IV | Weeks 5–6 | Soft solids |
| V | Week 7+ | Solid food, portion control |
3. Follow-Up
- Regular review with nutritionist and care team
- Monitor for complications
VII. COMPLICATIONS
| Complication | Management |
| Bleeding | Endoscopic control, transfusion |
| Perforation | Surgical consultation, antibiotics |
| Pain, nausea | Supportive care |
| Suture dehiscence | Re-do ESG or surgical revision |
| Obstruction | Dilation or surgical intervention |
VIII. TIPS & TRICKS
- Always use CO₂, not air
- Ensure full-thickness bites with the helix
- Avoid bites too close to the GEJ or pylorus
- Rotate scope/elevator smoothly to control bite angle
- Practice in models or animal labs before clinical use